How to Install a Dishwasher Like a Pro?
Are you tired of hand-washing dishes and ready to upgrade to the convenience of a dishwasher? Installing a dishwasher may seem like a daunting task, but fear not! Plumbing Service Group is here to guide you through the process step-by-step, ensuring a seamless installation that will have you enjoying your new appliance in no time.
Preparation is Key: Equip Yourself for Success
Embarking on the journey of installing a dishwasher demands more than just enthusiasm; it requires proper preparation. Before delving into the intricacies of installation, take a moment to ensure you have all the necessary tools and materials at your disposal. Here's a comprehensive list of what you'll need:
- Dishwasher Installation Kit: This comprehensive package typically contains an array of fittings, hoses, and clamps essential for connecting your dishwasher to the water supply and drainage system.
- Screwdriver: A trusty screwdriver is indispensable for various tasks during the installation process, such as securing panels or adjusting components.
- Adjustable Wrench: This versatile tool will come in handy for tightening and loosening nuts and bolts, particularly when connecting water supply lines.
- Level: Achieving perfect balance and alignment is crucial to ensure the smooth operation of your dishwasher. A level will help you accurately assess and adjust the appliance's position.
- Pliers: Whether it's tightening hose clamps or maneuvering small components, a sturdy pair of pliers is invaluable for various tasks throughout the installation.
- Teflon Tape: Seal the deal—literally! Teflon tape provides a reliable seal for threaded connections, safeguarding against leaks and ensuring a watertight installation.
- Safety Goggles: Don't overlook safety amid excitement. Protect your eyes with safety goggles to shield against potential hazards like debris or splashing water.
With these essential tools and materials gathered and at the ready, you're equipped to tackle the installation process with confidence and precision. So, roll up your sleeves, gather your supplies, and let's make installing your dishwasher a seamless and successful endeavor!
Step-by-Step Instructions on How to Install a Dishwasher
Step 1: Choose the Right Location
Selecting the ideal location for your dishwasher is the foundation of a successful installation. Here's a closer look at this crucial step:
Proximity to the Kitchen Sink: Opt for a location near your kitchen sink to streamline access to both water and drainage connections. This ensures convenience during operation and simplifies the installation process.
Sufficient Space: Assess the available space to accommodate your dishwasher. Ensure ample room for the appliance within the designated area, considering its dimensions and clearance requirements. Additionally, verify that the surrounding cabinets allow for seamless integration and accessibility.
Level Surface: Prioritize a level surface for your dishwasher installation. Uneven flooring can lead to instability and potential leaks. Use a level to confirm that the installation area is flat and adjust as necessary to achieve optimal balance.
Step 2: Prepare the Space
Before proceeding with installation, meticulous preparation sets the stage for success:
Power and Water Supply: Begin by turning off the power to the dishwasher circuit and shutting off the water supply. Safety should always be a top priority during installation procedures.
Remove Kickplate: Access the front of the dishwasher by removing the kickplate. This step allows for easy access to the appliance's underside and facilitates seamless integration into the designated space.
Positioning the Dishwasher: Carefully slide it into its designated location, ensuring it aligns flush with surrounding cabinets. Take care to avoid any obstructions or interference that may impede proper installation.
Step 3: Connect the Water Supply
Now, let's delve into connecting the dishwasher to the water supply:
Using Your Adjustable Wrench: Employ your adjustable wrench to connect the hot water supply line to the dishwasher's inlet valve. This crucial connection facilitates the flow of water into the appliance during operation.
Teflon Tape Application: Before making the connection, wrap Teflon tape around the threads of the water supply line. This step ensures a secure and watertight seal, minimizing the risk of leaks.
Leak Verification: Once the connection is established, thoroughly inspect it to ensure there are no signs of leakage. Vigilance at this stage helps preempt potential issues and ensures a reliable water supply to your dishwasher.
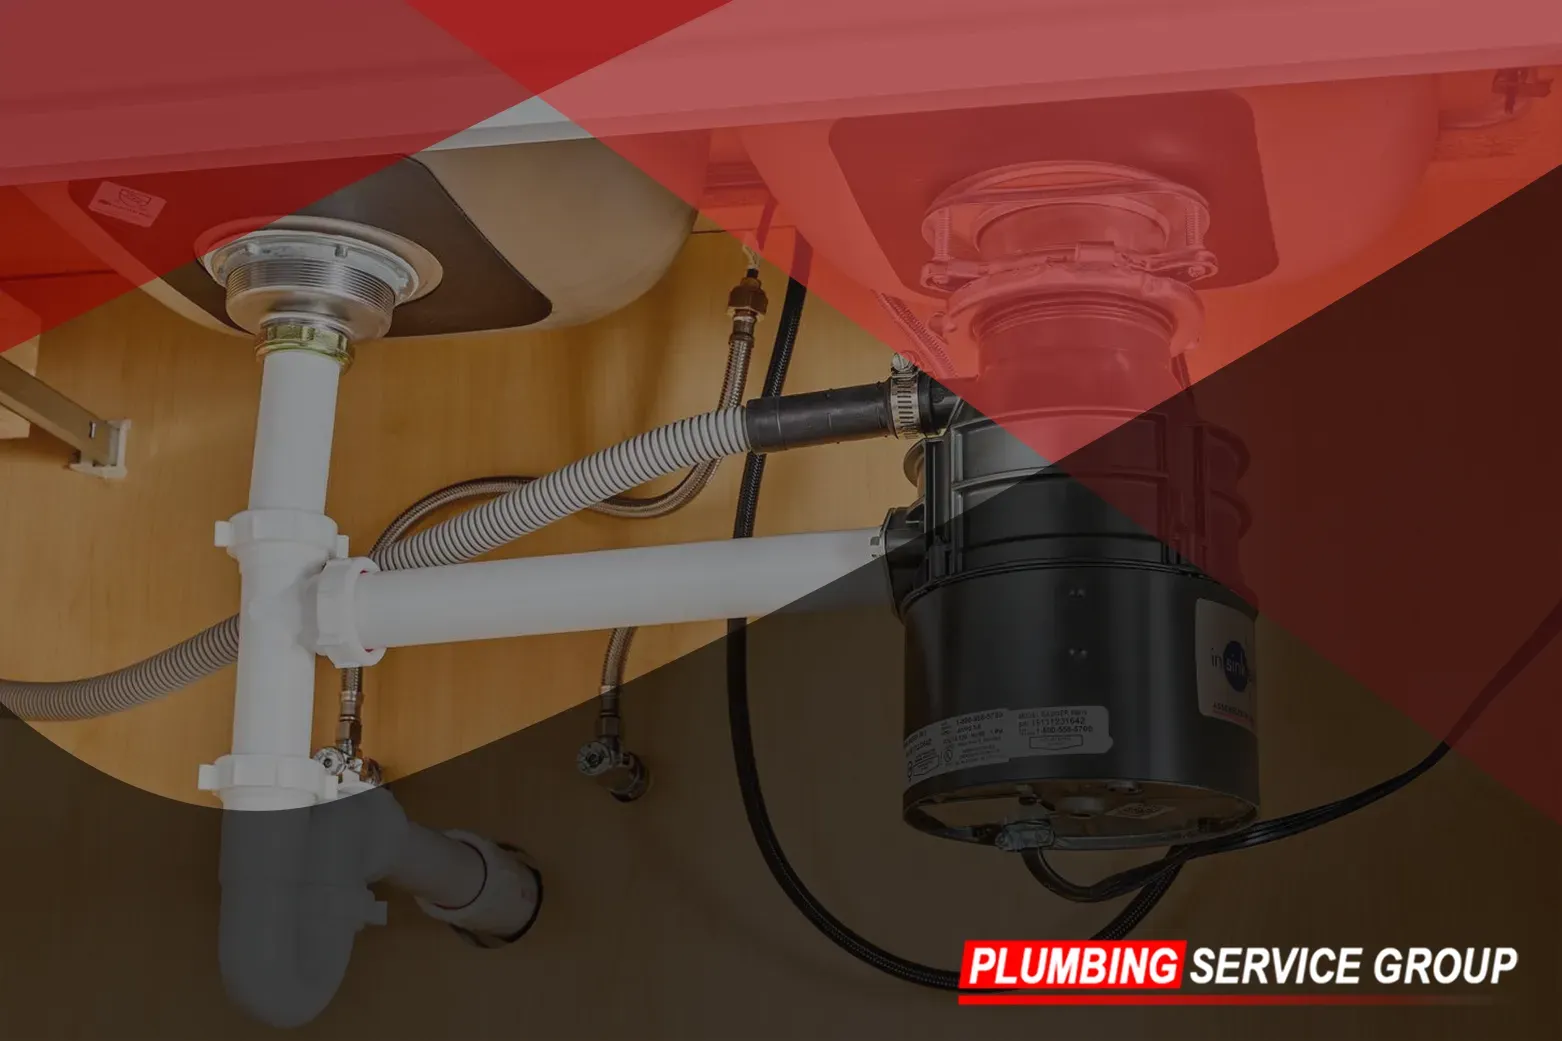
Step 4: Connect the Drain Hose
Moving on to the drainage aspect of the installation process:
Attaching the Drain Hose: Securely attach the dishwasher's drain hose to the designated drain point, such as the sink drain or garbage disposal unit. Utilize a hose clamp to fasten the connection in place firmly.
Ensuring Security and Accessibility: Verify that the drain hose is securely attached and free of any kinks or obstructions. A clear and unobstructed drainage pathway is essential for optimal dishwasher performance.
Step 5: Secure the Dishwasher
Achieving stability and balance is paramount for the long-term functionality of your dishwasher:
Utilizing Your Level: Employ a level to meticulously assess the dishwasher's positioning from front to back and side to side. Adjust the appliance's leveling feet as needed to achieve optimal balance and stability.
Preventing Leaks: Ensuring the dishwasher is securely positioned and level helps mitigate the risk of leaks, safeguarding your kitchen from potential water damage.
Step 6: Test the Connections
The final step involves putting your installation to the test:
Activation of Utilities: Restore the water supply and power to the dishwasher, allowing it to function as intended.
Test Cycle Initiation: Run a test cycle to evaluate the effectiveness of the installation and identify any potential leaks or operational issues.
Thorough Inspection: Conduct a comprehensive inspection of the connections and surrounding areas to verify the absence of leaks or abnormalities.
Kickplate Replacement: With the installation completed and verified, reattach the kickplate to the front of the dishwasher, completing the process.
Congratulations! By following these detailed steps, you've successfully installed your dishwasher with precision and confidence. Enjoy the convenience and efficiency of your newly integrated appliance, courtesy of Plumbing Service Group's expert guidance. For expert plumbing services you can trust, turn to Plumbing Service Group. Contact us today to schedule an appointment!